Mounting Location Guidance:
CrashBoxx requires the device be mounted to a secure, solid location in the front of the vehicle to ensure proper crash detection and device communication. To prevent false crash detection events, the device must be mounted to a solid base and the installation should not use the wiring harness to secure the device. Often the OBD-II port in the vehicle offers enough support for proper installation; however securing the device in this manner is susceptible device disconnects or unintentional unplugging, and for this reason it is highly recommended to use a OBD splitter “Y” or extension cable to enable device mounting in one of the locations noted below:
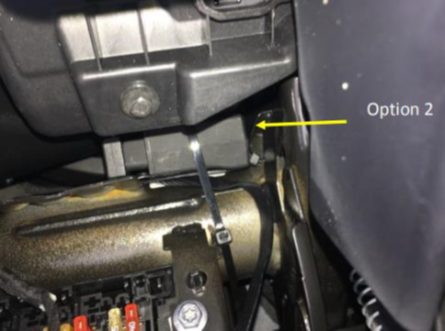
- At the bottom of the vehicle.
- Instrument panel support structure.
- Center console surface.
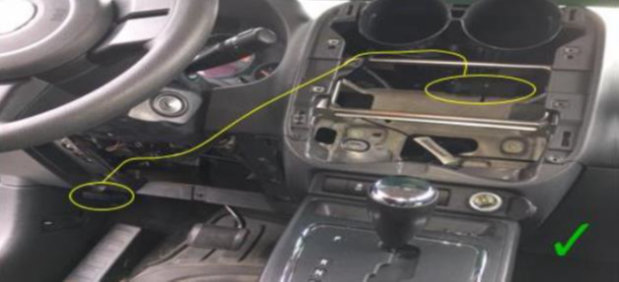
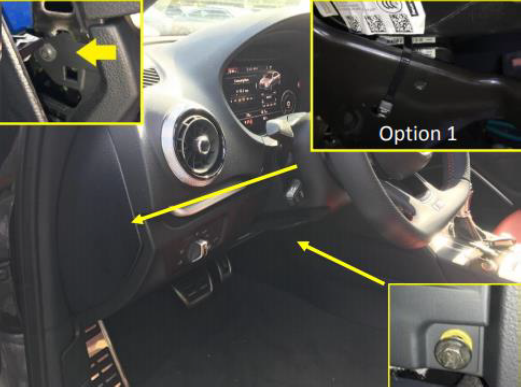
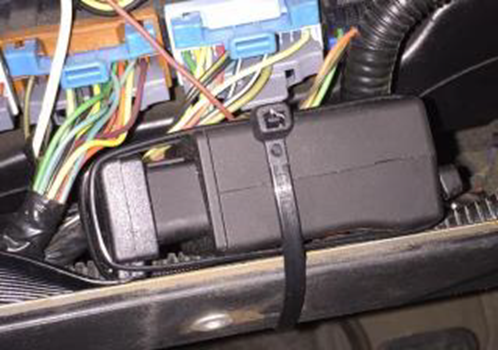
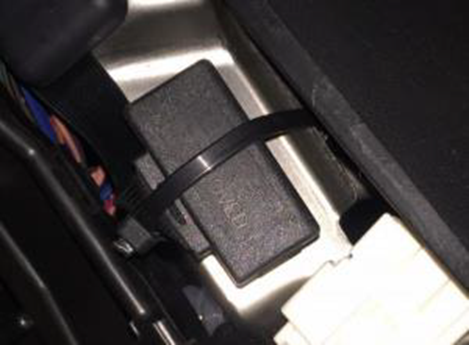
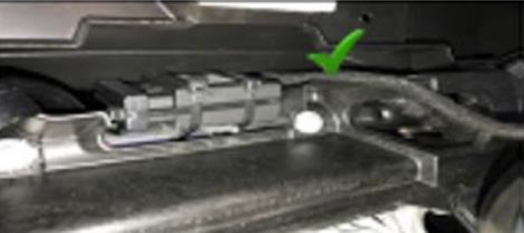
Examples of recommended locations for CrashBoxx installations:
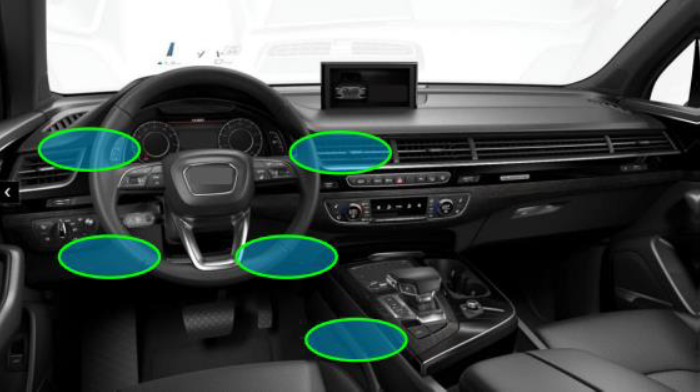
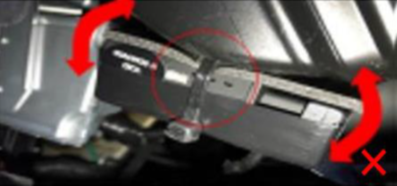
The following installation practices are not recommended:
- Secure device with wiring harness.
- Secure device to removable panels.
- Secure device to the steering column.
- Install device within 2” from the radio.
NoteThe device's GPS antenna must be facing upward without any metal near the device, and there should enough space to route the extension cable or Y cable back to the OBD-II port.
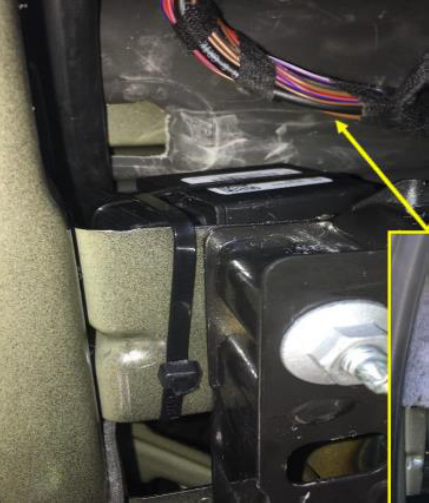
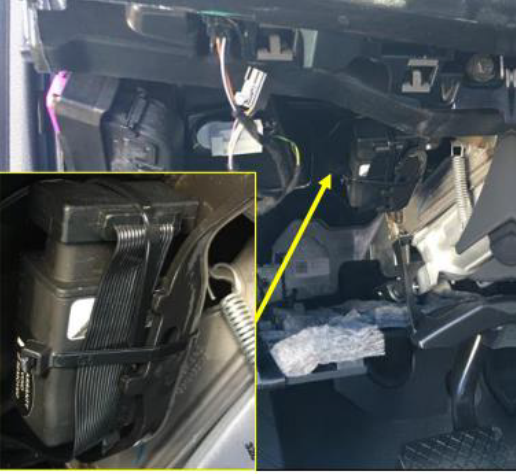
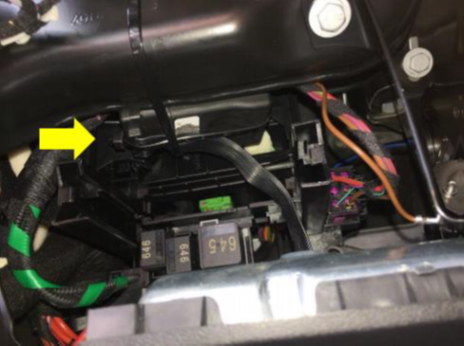
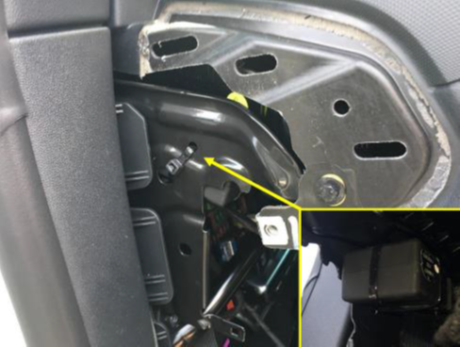
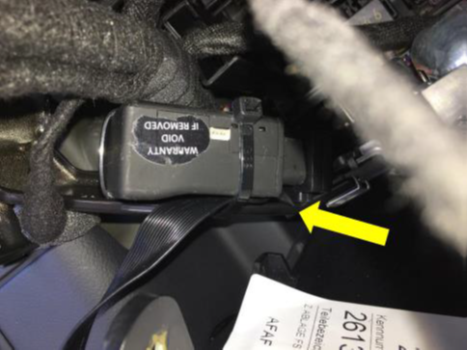
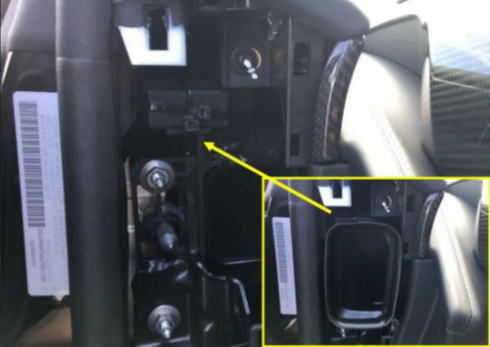
Examples of properly-mounted devices:
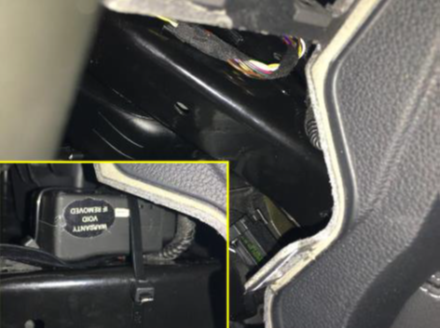
Example of improperly-mounted device:
Telematics Device Installation
OBD II Splitter Cable Installation:
If the installer opts to use a OBD-II splitter “Y” cable to install the telematics device, the device should be connected to the end of the cable and the free OBD II port should be secured to the original OBD port location.
Everything should be mounted and the vehicle turned on PRIOR to plugging in the male connector of the Y cable to the car’s OBD-II port. This is required to enable the automatic device calibration and prevent false crash notifications caused by the installation.
If customer opts to use an OBD II extension cable, the same steps listed above should be followed. However; without a free OBD port on the vehicle if the customer brings the vehicle to a mechanic other place that would required OBD access, the extension cable will need to be unplugged and the customer must have knowledge of above steps to re-enable the Crashboxx service and device communication.
If device needs to be repositioned, it should first be un-plugged from the OBD-II port to prevent false crash notifications.
Installation Items to Consider
- The installation should take approx. 25 minutes (this depends on the technician expertise).
- Installer should test telematics device is correctly reading the VIN with the !VV command.
- If the device is not mounted correctly to a solid surface without vibration, CrashBoxx will not work properly.
Tools/Supplies required for installation
The follow list of tools should be used to secure and install the telematics device (at least):
- Double stick tape to secure the LMU device
- Tie wraps to fix the device
- Trim removal tool
- T-10 to T-18 Torx screw
- 8; 10; 11; 12; 5/16; 1/4; 9/32 MM Socket
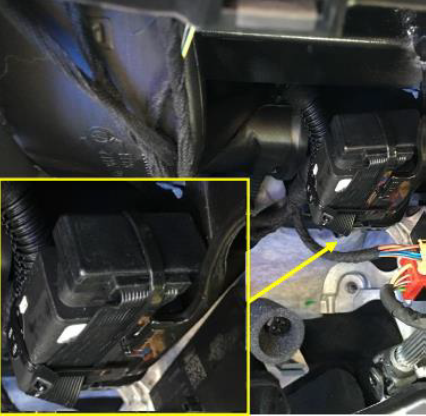
Examples of securely-mounted devices: